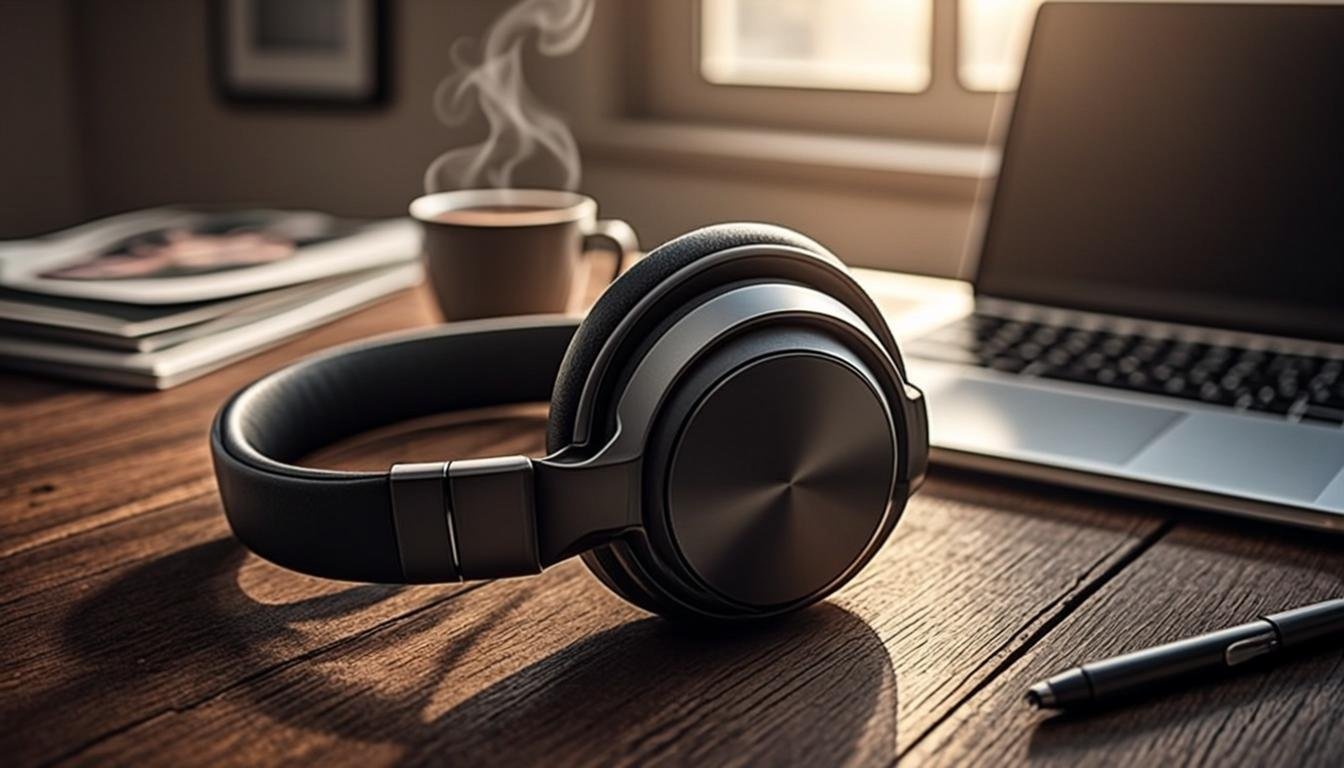


Choosing the Right Microphone for Your Content
Whether you’re launching a podcast, starting a YouTube channel, or creating course videos, your audio quality can make or break your content. I’ve listened to hundreds of podcasts and watched thousands of YouTube videos, and I can tell you without hesitation — bad audio is the number one reason viewers and listeners bail within the first 30 seconds. Great video can’t save terrible sound, but great sound can absolutely elevate mediocre video.
The microphone market in 2026 is packed with options at every price point, which is both a blessing and a curse. You’ve got choices ranging from $15 clip-on mics to $3,500 studio-grade setups. So how do you figure out what’s right for you? That’s exactly what we’re covering in this guide. We’ll break down the different types of microphones, compare the best options on the market, and help you find the perfect fit for your setup and budget.
Before we get into specific recommendations, let’s make sure you understand the fundamentals. If you’re already building a content creation business, having solid audio equipment is non-negotiable. Your audience expects it, and the platforms are starting to penalize content with poor audio quality.
USB vs. XLR: Which Connection Type Is Right for You?
The first decision you need to make is between USB and XLR microphones. This choice determines everything else about your setup — your budget, your accessories, and your learning curve. Let me break it down clearly.
USB Microphones: Plug and Play Simplicity
USB microphones are exactly what they sound like — you plug them directly into your computer (or phone, or tablet) via USB, and they work. No external audio interface needed, no complicated routing, no special cables. They’re the go-to choice for beginners and creators who want great sound without the technical hassle.
Modern USB microphones in 2026 are remarkably good. The technology has improved dramatically, and some USB mics deliver audio quality that rivals professional XLR setups costing twice as much. They’re also incredibly portable, making them perfect if you record in different locations or travel frequently.
The main limitations? Most USB microphones only support one person at a time, so if you want to record with a co-host in the same room, you’ll need two USB mics (which can cause sync issues). And while some higher-end USB mics offer low-latency monitoring, it’s still not quite as clean as what you get with a dedicated audio interface.
XLR Microphones: Professional Flexibility
XLR microphones are the industry standard for professional audio. They connect to an audio interface or mixer, which then connects to your computer. This gives you far more control over your sound — you can adjust gain, apply EQ, add compression, and route multiple microphones through a single device.
XLR setups shine when you’re recording multiple people, doing live streams, or working in a professional studio environment. They also tend to offer better long-term value because the microphone itself is a standalone piece of equipment that you can upgrade your interface around over time.
The trade-off is complexity and cost. You’ll need an audio interface (which costs $100-$300+), XLR cables, and a bit of technical know-how to set everything up properly. But once it’s dialed in, an XLR setup gives you a level of control and audio quality that’s hard to match with USB alone.
| Factor | USB Microphone | XLR Microphone |
|---|---|---|
| Setup complexity | Plug and play | Requires audio interface |
| Starting cost | $50–$350 | $100–$500 (plus interface) |
| Audio control | Basic (via software) | Full (gain, EQ, compression) |
| Multi-person recording | Difficult | Easy |
| Portability | Excellent | Moderate |
| Upgrade path | Replace entire mic | Upgrade individual components |
| Best for | Solo creators, beginners | Podcasters, studios, streamers |
Condenser vs. Dynamic: Which Pickup Pattern Fits Your Space
Once you’ve chosen your connection type, you need to decide between condenser and dynamic microphones. This decision is all about your recording environment and what you’re recording.
Condenser Microphones: Studio-Quality Sensitivity
Condenser microphones are incredibly sensitive and capture a wide range of frequencies with impressive detail. They’re the go-to choice for studio vocals, voiceovers, and ASMR content. If you’ve ever wondered how podcasters get that rich, “radio announcer” sound, it’s usually a condenser mic in a treated room.
The downside is that they pick up everything — keyboard clicks, traffic outside, air conditioning hum, the dog barking three rooms away. If you don’t have a quiet recording space, a condenser microphone will make your recordings sound messy. You’ll need some form of acoustic treatment or a quiet room to get the best results.
Dynamic Microphones: Built for Noisy Environments
Dynamic microphones are less sensitive and have a tighter pickup pattern, which means they focus on what’s directly in front of them and reject background noise much better than condensers. They’re the standard for live performances and broadcast studios, and they’re becoming increasingly popular with podcasters who record in less-than-ideal spaces.
If you’re recording in a home office, a shared apartment, or a room with echoes and background noise, a dynamic microphone is almost always the better choice. You won’t get quite the same level of detail as a condenser, but you’ll get clean, usable audio without needing to soundproof your entire room.
| Feature | Condenser | Dynamic |
|---|---|---|
| Sensitivity | Very high | Low to moderate |
| Noise rejection | Poor | Excellent |
| Frequency response | Wide and detailed | Warm and focused |
| Ideal environment | Treated studio | Any room |
| Power needed | Yes (phantom power or USB bus) | No |
| Best use case | Voiceovers, ASMR, studio vocals | Podcasts, streaming, noisy rooms |
Best Microphones for Podcasters and Video Creators in 2026
Alright, let’s get to the part you’ve been waiting for — the actual microphone recommendations. I’ve tested and researched dozens of microphones to put together this list. Every mic here earned its spot based on audio quality, value for money, build quality, and real-world usability for content creators.
1. Shure MV7+ — Best Overall Hybrid Mic
| Spec | Detail |
|---|---|
| Type | Dynamic (USB/XLR hybrid) |
| Price | $249 |
| Frequency response | 50Hz–16kHz |
| Polar pattern | Cardioid |
| Headphone output | Yes, with real-time monitoring |
| Mute button | Yes (touch-sensitive) |
Pros: Works as both USB and XLR so you can start simple and upgrade later. Excellent noise rejection. Built-in headphone jack for zero-latency monitoring. Companion app with real-time EQ and compression. Mute button with LED indicator.
Cons: Needs a boom arm for best positioning (the included desk stand is mediocre). Touch-sensitive mute can be accidentally triggered. Heavier than most USB mics.
The Shure MV7+ is the microphone I recommend to most podcasters and video creators who want a serious upgrade. It’s essentially a mini version of the legendary Shure SM7B, but with the convenience of USB built in. The fact that it supports both USB and XLR means you can start recording immediately and then add an audio interface later when you’re ready to take things to the next level.
2. Blue Yeti — Best Budget USB Option
| Spec | Detail |
|---|---|
| Type | Condenser (USB) |
| Price | $99 |
| Frequency response | 20Hz–20kHz |
| Polar patterns | Cardioid, omnidirectional, bidirectional, stereo |
| Headphone output | Yes |
| Mute button | Yes |
Pros: Extremely affordable. Four pickup patterns give you versatility. Plug-and-play with any computer. Built-in gain control and headphone jack. Wide availability.
Cons: Condenser design picks up lots of background noise. Heavy and bulky. Noisy gain knob on some units. Outclassed by newer competitors at the same price.
The Blue Yeti has been the default recommendation for beginner podcasters for over a decade, and for good reason — it works well and costs under $100. That said, it’s showing its age in 2026. If your room isn’t quiet, the condenser capsule will pick up everything. Consider the Yeti if you’re on a strict budget and have a reasonably quiet recording space.
3. Rode PodMic USB — Best Dynamic USB Mic
| Spec | Detail |
|---|---|
| Type | Dynamic (USB/XLR hybrid) |
| Price | $179 |
| Frequency response | 20Hz–20kHz |
| Polar pattern | Cardioid |
| Headphone output | Yes |
| Built-in DSP | Yes (via Rode Connect app) |
Pros: Dynamic capsule rejects background noise. USB/XLR hybrid flexibility. Rode Connect app is free and powerful. Built like a tank (all-metal construction). Internal shock mount reduces handling noise.
Cons: Requires Rode Connect for full features on USB. Slightly heavier than competitors. No physical gain knob — controlled via app.
Rode knocked it out of the park with the PodMic USB. It delivers broadcast-quality dynamic sound without needing an audio interface, and the all-metal construction means it’ll survive being knocked over more than once. The Rode Connect software gives you DSP controls (compression, EQ, noise gate, and a vocal de-esser) that would normally require a separate audio interface.
4. Audio-Technica AT2020USB+ — Best Budget Condenser
| Spec | Detail |
|---|---|
| Type | Condenser (USB) |
| Price | $149 |
| Frequency response | 20Hz–20kHz |
| Polar pattern | Cardioid |
| Headphone output | Yes (zero-latency) |
| Mix control | Yes (blend mic and playback) |
Pros: Exceptional audio quality for the price. Smooth, natural sound profile. Mix control lets you blend mic audio with computer audio. Well-built with minimal desk stand. Great for voiceovers and solo recordings.
Cons: Condenser design means it picks up room noise. No mute button. No gain knob (controlled via OS). Not ideal for multi-person setups.
If you have a reasonably quiet room and want the most natural-sounding vocals possible under $150, the AT2020USB+ is tough to beat. It’s been a staple in home studios for years because it just sounds good. The audio is warm without being muddy, and detailed without being harsh. For podcast creators who record in a closet or treated room, this is a fantastic choice.
5. Shure SM7B — The Industry Standard (XLR)
| Spec | Detail |
|---|---|
| Type | Dynamic (XLR only) |
| Price | $399 |
| Frequency response | 50Hz–20kHz |
| Polar pattern | Cardioid |
| Special features | Internal shock mount, hum-bucking coil |
| Required accessories | Audio interface, XLR cable, boom arm |
Pros: Professional broadcast quality. Outstanding noise rejection. Extremely durable. Used by top podcasters and YouTubers worldwide. Excellent with any preamp once properly driven.
Cons: XLR only — requires an audio interface. Needs a lot of gain (some interfaces struggle to drive it). Expensive once you factor in all accessories. Overkill for casual creators.
The Shure SM7B is the microphone that serious podcasters aspire to own. It’s been used by everyone from Joe Rogan to your favorite niche YouTube creators, and it delivers that warm, polished broadcast sound that instantly makes your content feel professional. But make no mistake — this is a serious investment. Between the mic itself ($399), a decent audio interface ($150-$300), a boom arm ($100), and an XLR cable ($15-$30), you’re looking at a $700+ investment before you record a single word.
6. HyperX SoloCast — Best Budget USB for Video Creators
| Spec | Detail |
|---|---|
| Type | Condenser (USB-C) |
| Price | $59 |
| Frequency response | 20Hz–20kHz |
| Polar pattern | Cardioid |
| Mute button | Yes (LED indicator) |
| Mount | Tap-to-mute, built-in shock mount |
Pros: Incredibly affordable. Compact design that doesn’t block your face on camera. Tap-to-mute with LED. USB-C connection. Plug-and-play simplicity.
Cons: Condenser capsule picks up room noise. No headphone jack. No gain control. Sound quality is decent but not outstanding.
If you’re a video creator who wants to look good on camera (meaning you don’t want a giant microphone blocking half your face), the HyperX SoloCast is a brilliant little option. It’s tiny, it’s cheap, and the audio quality is perfectly fine for YouTube videos, TikTok content, and casual streaming. It won’t win any awards for sound quality, but it also won’t dominate your frame.
7. Elgato Wave:3 — Best for Streamers
| Spec | Detail |
|---|---|
| Type | Condenser (USB-C) |
| Price | $149 |
| Frequency response | 70Hz–20kHz |
| Polar pattern | Cardioid |
| Software | Wave Link (free) |
| Special features | Clipguard technology, multi-app audio mixing |
Pros: Wave Link software is incredibly powerful (virtual audio mixing). Clipguard prevents audio distortion. Clean, modern design. Multi-device audio routing. LED indicator for mute status.
Cons: Condenser design (room noise). Wave Link software has a learning curve. No XLR output option. Not ideal for untreated rooms.
The Elgato Wave:3 was designed specifically for live streamers, and it shows. The Wave Link software lets you mix audio from multiple sources (game, Discord, browser, mic) independently, which is a game-changer for streamers who want granular control over their audio levels. The Clipguard technology is also genuinely useful — it prevents audio from clipping even if you suddenly get excited and yell.
8. Zoom ZDM-1 — Best Budget Dynamic Podcaster Mic
| Spec | Detail |
|---|---|
| Type | Dynamic (XLR) |
| Price | $99 |
| Frequency response | 50Hz–15kHz |
| Polar pattern | Cardioid |
| Special features | Internal shock mount, heavy-duty grille |
| Required accessories | Audio interface, XLR cable, boom arm |
Pros: Very affordable for a dynamic microphone. Excellent background noise rejection. Durable all-metal construction. Internal shock mount. Great for noisy environments.
Cons: XLR only (requires audio interface). No USB option. Frequency response is narrower than premium dynamics. Needs a decent preamp to sound its best.
Zoom is best known for their portable recorders, but the ZDM-1 proves they can make a solid podcast mic too. For under $100, this dynamic microphone delivers broadcast-quality noise rejection in a rugged, well-built package. It’s the perfect entry point into XLR audio if you’re not ready to drop $400 on an SM7B.
9. Rode Wireless PRO — Best for Mobile/Field Recording
| Spec | Detail |
|---|---|
| Type | Wireless lavalier system (2x TX + 1x RX) |
| Price | $299 |
| Range | Up to 200m (line of sight) |
| Battery life | 7 hours per transmitter |
| Recording | 32-bit float on-board recording |
| Compatibility | USB-C, 3.5mm, Lightning adapters |
Pros: 32-bit float recording (impossible to clip). Timecode sync for video. GainAssist for automatic levels. Compact and lightweight. Works with cameras, phones, and computers.
Cons: Wireless systems can experience interference. Lav mics don’t sound as full as desktop microphones. Expensive for a mobile setup.
If you’re a video creator who shoots on location, vlogs, or does interviews outside of your studio, the Rode Wireless PRO is worth every penny. The 32-bit float recording means you literally cannot clip your audio — even if someone screams, the system captures it cleanly and you can adjust levels in post. That peace of mind alone is worth the price.
Full Comparison Table
Here’s a side-by-side look at all the microphones we’ve covered so you can quickly compare specs and prices:
| Microphone | Type | Connection | Price | Noise Rejection | Best For |
|---|---|---|---|---|---|
| Shure MV7+ | Dynamic | USB/XLR | $249 | Excellent | Overall best pick |
| Blue Yeti | Condenser | USB | $99 | Poor | Budget beginners |
| Rode PodMic USB | Dynamic | USB/XLR | $179 | Excellent | Value dynamic USB |
| AT2020USB+ | Condenser | USB | $149 | Poor | Quiet room vocals |
| Shure SM7B | Dynamic | XLR | $399 | Excellent | Professional studios |
| HyperX SoloCast | Condenser | USB-C | $59 | Poor | Video creators on budget |
| Elgato Wave:3 | Condenser | USB-C | $149 | Poor | Live streamers |
| Zoom ZDM-1 | Dynamic | XLR | $99 | Excellent | Budget XLR entry |
| Rode Wireless PRO | Wireless | USB-C/3.5mm | $299 | Good | Field recording |
Essential Accessories You’ll Need
A microphone alone isn’t enough to get professional audio. Here are the accessories that actually make a difference in your sound quality:
Boom Arm or Mic Stand
Never place your microphone directly on your desk. Every desk vibration — typing, mouse clicks, desk bumps — will travel through the stand and into your microphone. A boom arm that clamps to your desk eliminates this problem entirely and lets you position the mic at the perfect distance from your mouth.
Good options include the Rode PSA1 ($109) for a premium option, or the InnoGear boom arm ($30) for a budget-friendly alternative.
Pop Filter or Windscreen
Plosives — those harsh “P” and “B” sounds that create a burst of air — will ruin your recordings if you don’t have a pop filter. Most dynamic microphones (like the SM7B and PodMic) have built-in windscreens, but you might still want an external pop filter for extra protection, especially with condenser mics.
Acoustic Treatment
If you’re using a condenser microphone, you need to deal with room reflections. Echoey rooms make your audio sound hollow and unprofessional. You don’t need to spend thousands on professional acoustic panels. A simple solution is to put up some acoustic foam or heavy blankets behind you and on the walls facing your mic. Some creators even record in closets full of clothes — it sounds silly, but it works.
Products like the Kaotica Eyeball ($99) sit directly over your microphone and absorb reflections before they reach the capsule. It’s a brilliant solution for condenser mic users who can’t treat their whole room.
XLR Cable
If you’re going the XLR route, you need a quality cable. Don’t cheap out here — a bad cable can introduce hum, buzz, and intermittent signal drops. Look for cables with Neutrik or Switchcraft connectors and oxygen-free copper wiring. A 10-foot cable should be more than enough for most desk setups.
Audio Interface (XLR Setups Only)
Your audio interface is the bridge between your XLR microphone and your computer. It converts the analog signal from your mic to a digital signal your computer can record. The Focusrite Scarlett 2i2 ($169) is the most popular choice for podcasters and has been for years because it’s reliable, sounds great, and works with every major recording software.
Recording Tips for Beginners
Even the best microphone in the world won’t save bad recording technique. Here are the tips that’ll make the biggest difference in your audio quality:
Get Close to the Mic
The closer you are to your microphone, the more of your voice it captures relative to the room noise. For most desktop microphones, aim for 4-8 inches away. For dynamic mics like the SM7B, you can get even closer — 2-4 inches gives you that rich, up-close radio sound. Just be careful about plosives if you’re that close.
Record at the Right Level
Your recording level should peak around -12dB to -6dB. If you’re hitting 0dB or going into the red, your audio will distort and there’s no fixing that in post-production. If your levels are too low (below -24dB), you’ll have to boost the signal later, which also amplifies background noise.
Record in the Quietest Part of Your Space
Close windows, turn off fans and air conditioning, put your phone on airplane mode, and ask anyone else in the house to keep it down for 20 minutes. The less background noise your microphone has to compete with, the cleaner your recording will be.
Do a Test Recording Before the Real Take
Spend 30 seconds recording a test, then listen back with headphones. Check for background noise, levels, and any buzzing or humming. It’s way better to catch problems during a 30-second test than after you’ve recorded a 45-minute episode.
Edit Your Audio
Raw recordings almost always need some cleanup. At minimum, apply noise reduction, compress your audio to even out volume levels, and add a limiter to prevent any peaks. Free tools like Audacity can handle all of this, and paid options like Descript make audio editing as easy as editing a text document.
If you’re also writing blog posts alongside your audio and video content, having good editing skills across all mediums is a huge advantage. Our guide on the best free blogging tools includes audio editors alongside other free resources for creators.
Use Headphones While Recording
Always monitor your audio with headphones while you record. This lets you catch problems in real time — background noise, electrical hum, echo, and level issues. Recording without headphones is like driving with your eyes closed — you won’t know something’s wrong until it’s too late.
How to Choose: Quick Decision Guide
Still not sure which mic is right for you? Here’s a quick guide based on common creator profiles:
- “I’m just starting and have no budget” — HyperX SoloCast ($59) gets you recording today
- “I want something better than my laptop mic but not expensive” — Blue Yeti ($99) or Rode PodMic USB ($179)
- “I want professional audio and can spend $250+” — Shure MV7+ ($249) is the sweet spot
- “I’m building a professional studio” — Shure SM7B ($399) + Focusrite 2i2 ($169)
- “I stream on Twitch or YouTube Live” — Elgato Wave:3 ($149) for the software
- “I record videos on location” — Rode Wireless PRO ($299) for wireless freedom
- “I share a room with others” — Any dynamic mic (PodMic USB, MV7+, SM7B)
- “I have a quiet, treated room” — Condenser mic (AT2020USB+, Yeti) for richer sound
Budget Breakdowns by Tier
| Tier | Total Budget | Setup |
|---|---|---|
| Starter | $90–$150 | HyperX SoloCast + cheap boom arm + free software |
| Serious Beginner | $200–$300 | Rode PodMic USB + Rode PSA1 boom arm + Audacity |
| Prosumer | $400–$500 | Shure MV7+ + Rode PSA1 + pop filter + Descript |
| Professional | $600–$800 | Shure SM7B + Focusrite 2i2 + boom arm + XLR cable |
| Studio | $1,000+ | SM7B + premium interface + acoustic treatment + accessories |
FAQ: Microphones for Podcasters and Video Creators
Do I really need a separate microphone, or is my built-in laptop mic fine?
If you’re recording content that other people are going to listen to, yes — you need a real microphone. Your laptop’s built-in mic sounds tinny, picks up fan noise, and makes your content feel amateurish regardless of how good your video or message is. Even a $60 USB mic will sound dramatically better than any laptop microphone.
Is USB good enough, or do I need XLR for professional quality?
USB microphones have come a long way and can absolutely deliver professional-quality audio. In 2026, high-end USB mics like the Shure MV7+ and Rode PodMic USB sound virtually identical to their XLR counterparts. Unless you need to record multiple people simultaneously or want advanced audio routing, USB is perfectly fine.
How much should I budget for my first microphone setup?
Plan to spend between $150 and $300 total for your first real setup. That should cover the microphone, a boom arm, and any cables you need. You can start cheaper ($60-$100) if you’re willing to compromise on audio quality, but spending a bit more upfront means you won’t need to upgrade as quickly.
What’s the biggest audio mistake beginners make?
Recording in a noisy, echoey room without any treatment. A $400 microphone in a bad room will sound worse than a $60 microphone in a treated closet. Focus on your recording environment before you obsess over which microphone to buy. Soft furnishings, blankets, and foam panels make a massive difference.
Can I use one microphone for both podcasting and YouTube videos?
Absolutely. Most microphones on this list work great for both formats. The only consideration is visual — if you’re on camera, you might prefer a more compact or visually appealing mic that doesn’t dominate the frame. The HyperX SoloCast and Elgato Wave:3 are particularly good choices for on-camera creators.
How do I reduce echo in my recordings without buying acoustic panels?
The cheapest and most effective trick is to record in a small room filled with soft materials — a closet full of clothes works great. Alternatively, hang heavy blankets behind and around your recording area, or use a reflection filter that sits behind your microphone. Moving closer to the mic (within 4-6 inches) also helps because the mic picks up more of your direct voice relative to room reflections.
Should I use a dynamic or condenser microphone for podcasting?
It depends on your room. If you have a quiet, treated space or a closet you can record in, a condenser mic gives you richer, more detailed audio. If you’re recording in a normal room with background noise and echo, a dynamic microphone is the better choice because it rejects room noise much more effectively. Most home podcasters are better off with dynamic mics.
What software do I need to record and edit audio?
For recording, Audacity is completely free and handles everything most creators need. Descript ($24/month) is a paid option that lets you edit audio by editing a text transcript — it’s incredibly intuitive. Adobe Audition ($23/month) is the professional standard. For live recording and streaming, OBS Studio is free and widely used.

Other Articles